Here at Safe Software, we take office-wide competitions very seriously – especially when it involves a free team lunch. Of course, we always make sure to have fun along the way but when you’re given the opportunity to knock your competition off the edge or slow them down by making them slip on a banana peel, you just have to pull the trigger.
Being the defending champions, we felt that we really needed to step up our game to keep the coveted best team costume trophy within the Experts team. With the help of FME and the FMEAR app, we were able to transform our lounge into Rainbow Road using our building blueprints, images from the web, and a handful of free FBX and OBJ files from Sketchfab.
The Team
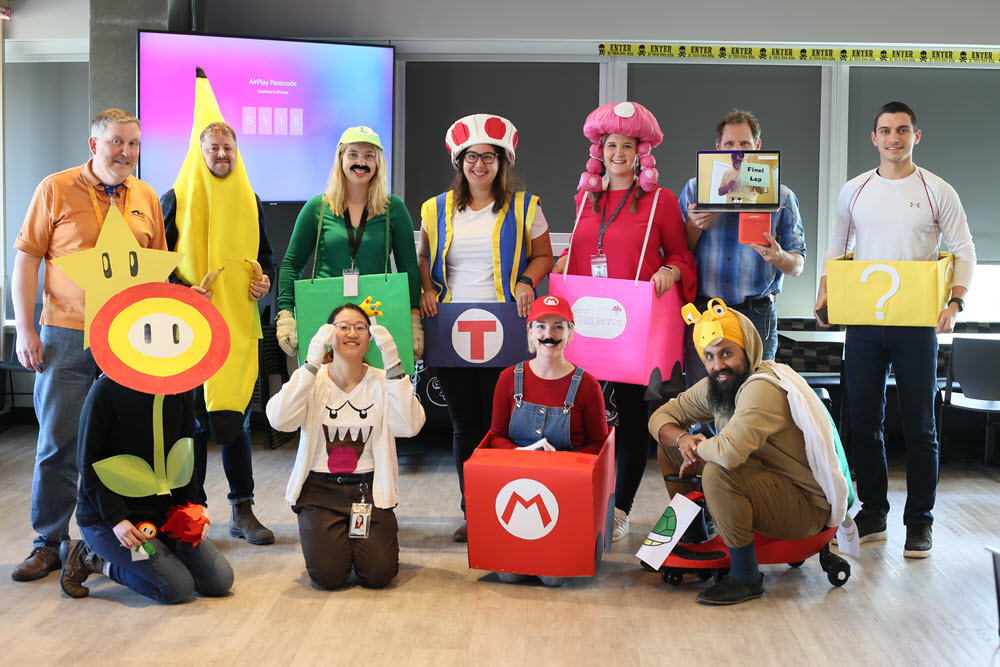
From left to right. Top row: Super Star (Dan Iseminger), Giant Banana (Brian Pont), Luigi (Sienna Emery), Toad (Andrea Eisma), Toadette (Holly Coxon), Lakitu (Mark Ireland-held by Steve MacCabe), Mystery Box (Christian Berger). Bottom row: Fire Flower (Debbi Leung), King Boo (Jovita Chan), Mario (Laura Wu), Koopa Troopa (Nampreet Singh).
The Workspace
Step 1: Gathering the dimensions
Since we had access to our buildings blueprints, we were able to view the dwg drawing in AutoCAD to quickly get the dimensions of the lounge, distance between the counters, and length of the track. Alternatively, if you don’t have AutoCAD, you could use the Measure Distances tool in the FME Data Inspector to get the dimensions. This step is not dependent on having access to building blueprints, although it certainly helped speed things up. If we didn’t have access to this, we could have also used a measuring tape to get this essential information.
Step 2: Building the Road
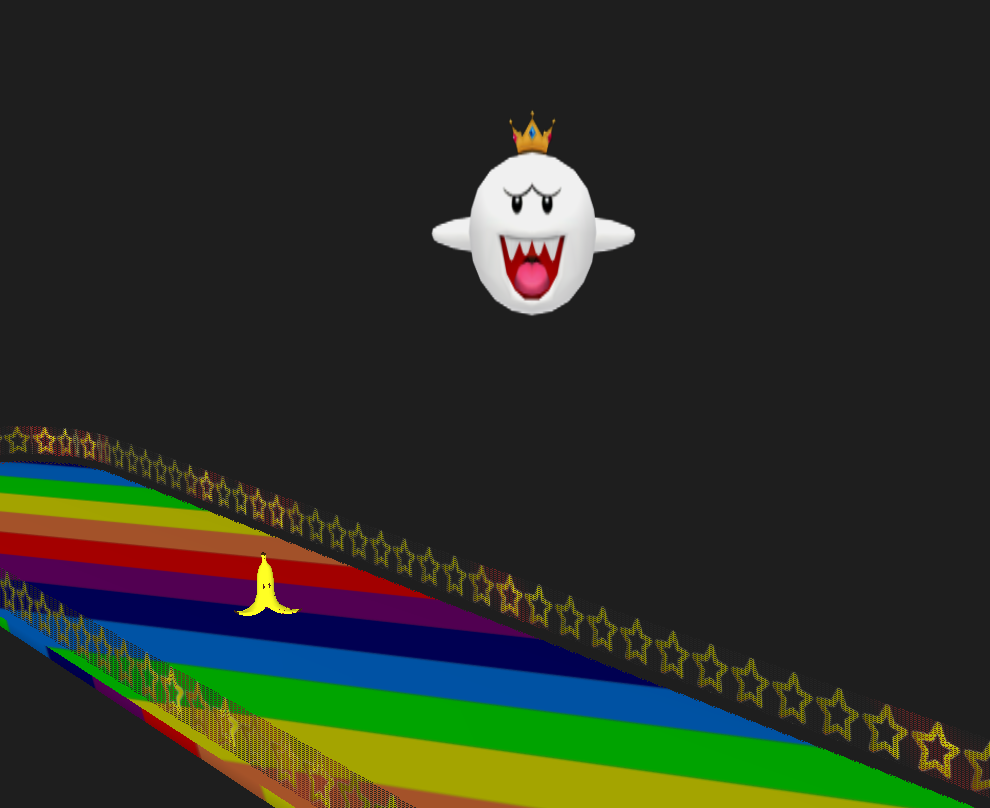
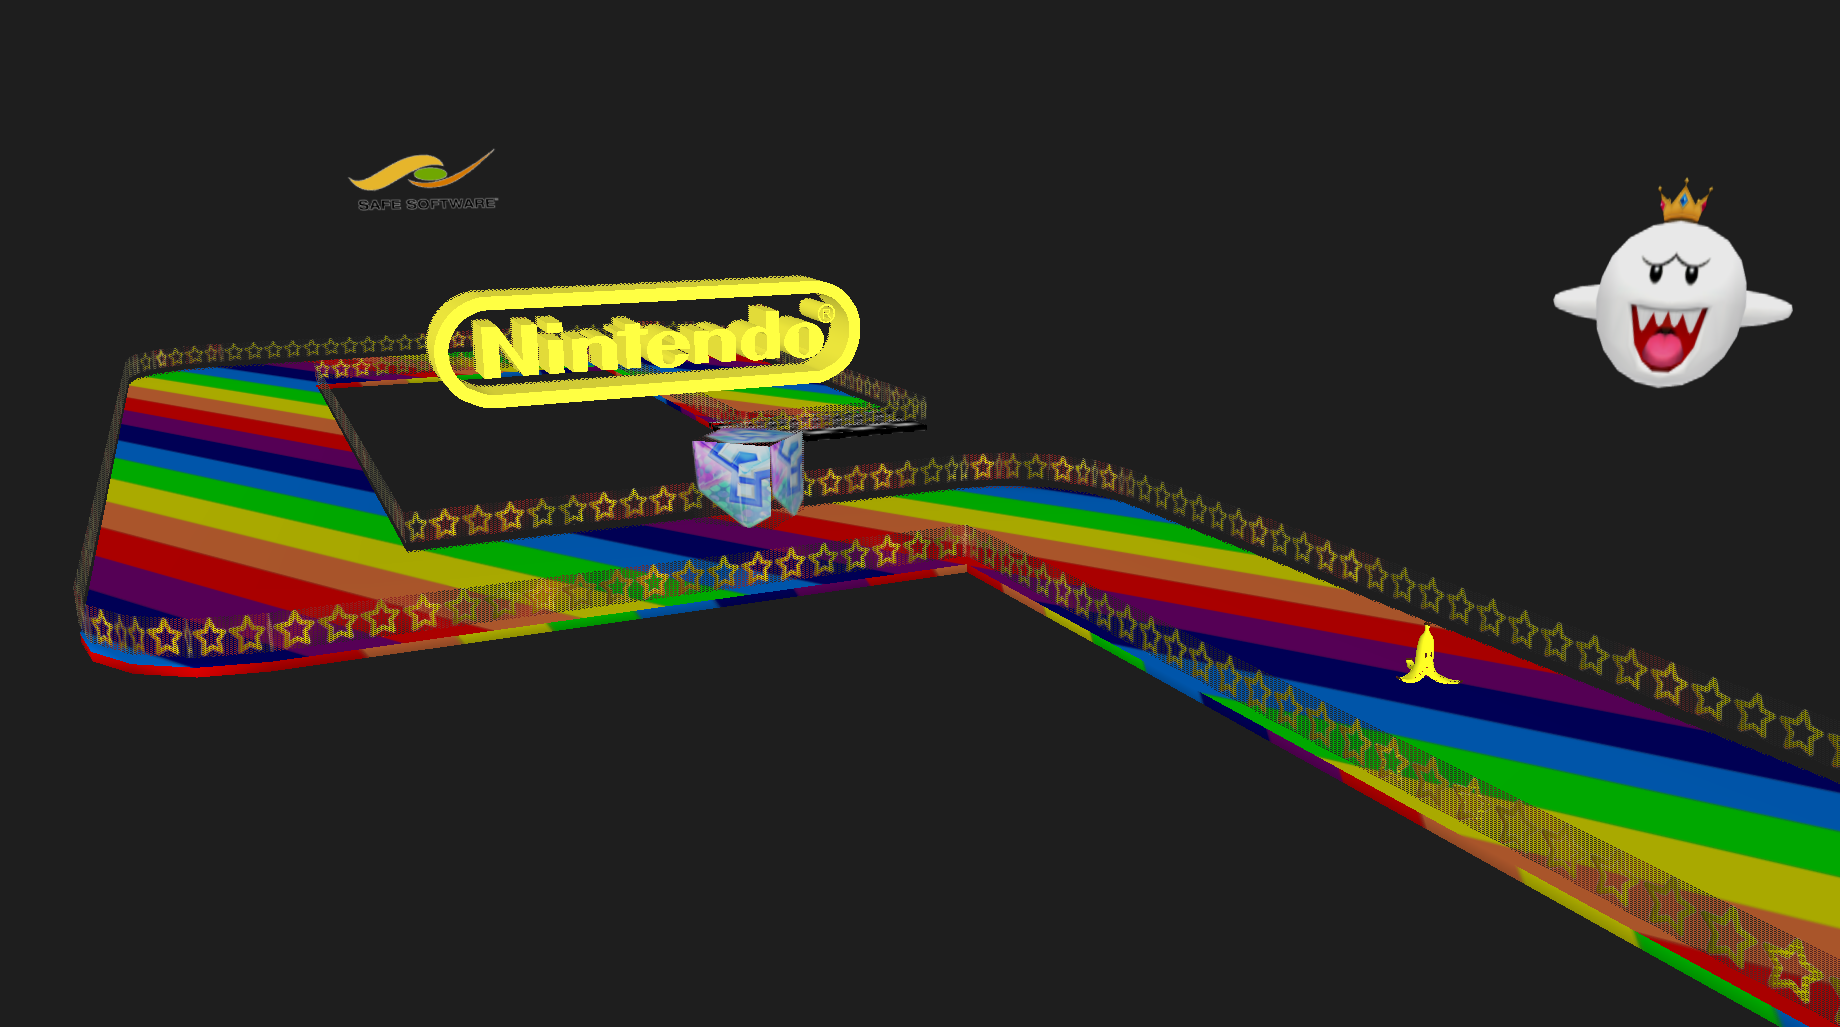
Once we knew the path of the race track, we were able to buffer the line to add the width needed to make this into a road. Next, we overlaid a rainbow patterned image on top of the road surface with an AppearanceStyler. Of course, Rainbow Road wouldn’t be complete without a checkered flag finish line. We generated a raster checkerboard using the RasterRGBCreator that we could used to mark the end of the track.
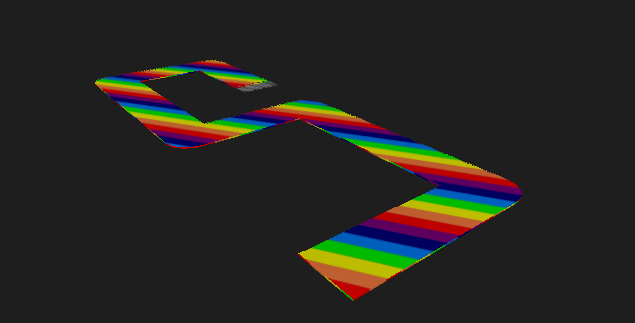
Getting the track dimensions correct is by far the most important step because it is the backbone for the remaining features that were integrated on and around the track.
Step 3: Adding Safety Features
With the road paved and painted, it was time to create some safety features to keep our team on the race track. To do this, we reused the polygon that made up race track in order to create a star rail. First, we dissolved the road and finish line sections into a single polygon feature. Second, we converted the polygon into line feature with a GeometryCoercer. Next, we split the line into smaller segments using the LineDivider and extruded the lines to make them the same height and width. Lastly, we overlaid an image of a cartoon star with a transparent background onto our 3D line feature to create a star rail and aggregated into a single feature. In this case, we found it easier to work with smaller 3D line segments and overlay a single image of a cartoon star on each segment to give it a consistent look.
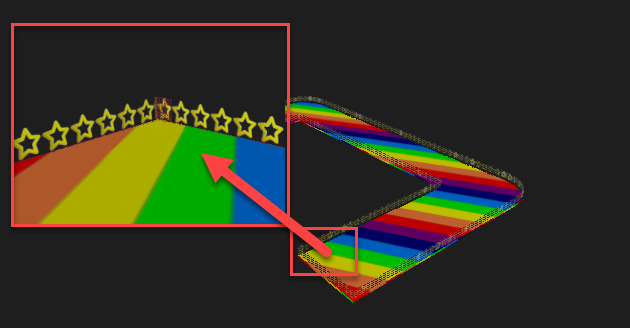
Note: If you use an image with a solid background you can make the background transparent using a RasterBandNoDataSetter.
Step 4: The finishing touches
We then added a few objects to the surrounding environment to make it feel more authentic. The 3D objects, such as the Nintendo Logo, the banana peel, and Lakitu were downloaded from Sketchfab then scaled and positioned in FME.
| Mario Kart: | FME AR (displayed in Visual Preview): |
 |
 |
The Race
Ok here comes the fun part, thanks to the FMEAR app and Apple Airplay, we were able to stream what we were viewing through the phone on to the surrounding TV’s in the lounge.
The FMEAR App is available on both iOS and Android so get creative! We’d love to see what you can come up with!

Christian Berger
Chris is one of the FME Desktop Technology Experts that helps users in their day to day data issues. He’s not just a GIS buff though - he also used to play on his university’s football team!