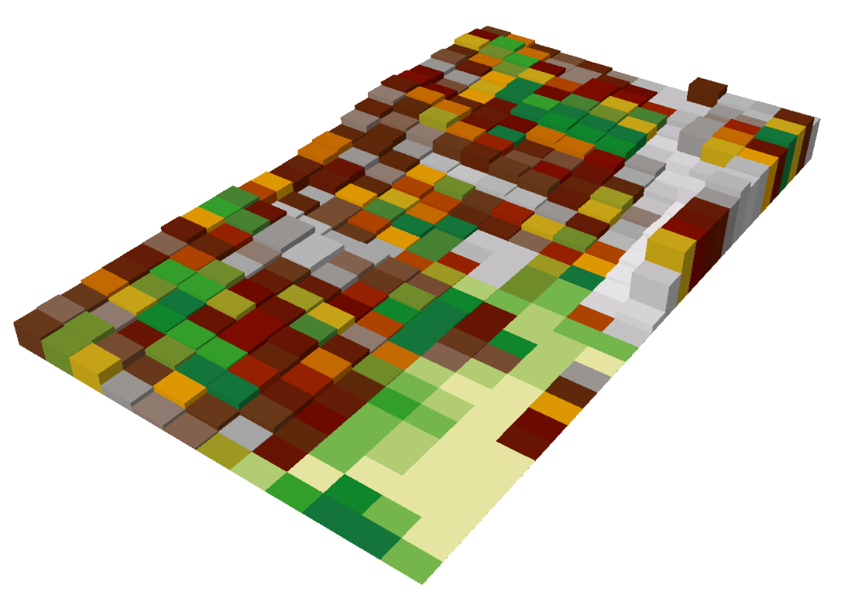
Assembling the model. Click to enlarge.
The team at the City of Oslo has built an updateable 7.6 x 4.5 meter physical 3D model of the city – with 3D printers, quite a bit of FME, and a lot of time, patience, and attention to detail.
It seems like just yesterday that I had an after-school job running the pen plotter at a custom mapping company. And every time I took a wall-sized map off, ran the edges through the cutter, and rolled it up with the work order to send out, I had this sense of satisfaction in producing something concrete that someone would touch and use.
Geospatial technology has taken us to amazing places since then – but they’ve become increasingly virtual. And so when I heard about what Kay Henning Kleverud and the rest of the team at the City of Oslo were up to for the last couple of years, I just had to bring you their story.
3D Printing a City – in Pieces
The reception area at the office of the Agency for Planning and Building Services in Oslo is home to a brand-new 3D model – produced by a team of seven over a period of two years and done with 3D printers. And FME played a key role in the process.
Staggered elevations on the frame reduce printing material and time. Click to enlarge.
The model is enormous – at a scale of 1:1,000, it represents an area of 34.8 square kilometers. It measures 7.6 by 4.5 meters –nearly 25 feet by 15 feet. The base is a laser-cut wooden frame, supporting 360 tiled blocks, each one approximately A3 size. Each block can be easily removed to reprint with updated information, keeping the model right up-to-date.
The frame follows minimum elevations for the block areas, cutting down on the expensive material and time needed to print the actual blocks.
Preparing the Data
There were two basic categories of data needed for input – terrain and buildings.
They started out with some good LiDAR point cloud data at 43 points per square meter. With some FME work to filter out the noise and buildings, they were left with the terrain.
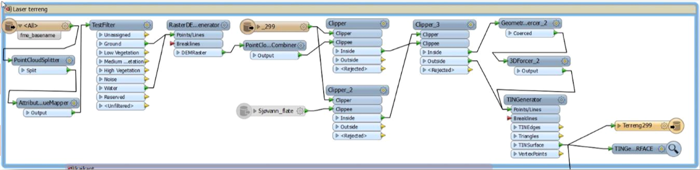
A challenge cropped up here, though – the 3D printer program that would generate the ultimate output handled irregular triangles very poorly. So by adding the interim step of creating a raster DEM with its regular pixels, the TINGenerator produced a surface with regular polygons – a triangulated regular network.
The AppearanceSetter applies colors from a draped raster. Click to enlarge.
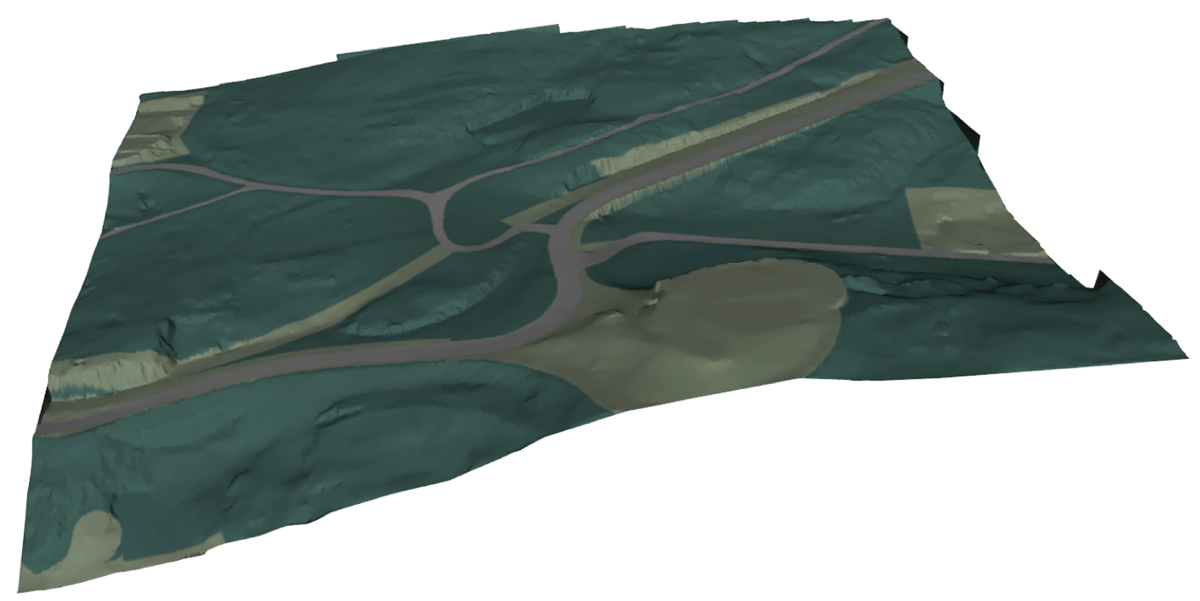
Since the printers had full-color capability, the next step for terrain was to drape a geoTIFF on it and use the AppearanceSetter to color it.
The buildings were stored in a SOSI (Norwegian national standard) database, and needed to be converted to proper 3D geometry before attaching them to the terrain – and it needed to be done perfectly.
“The biggest challenge was to make sure the buildings were ‘waterproof’,” says Kay. “A 3D model can look great digitally, but even tiny mistakes can end up ruining the print. A building may have walls and roof, but if you don’t add a floor, and have everything seamlessly joined, the output can go badly awry.”
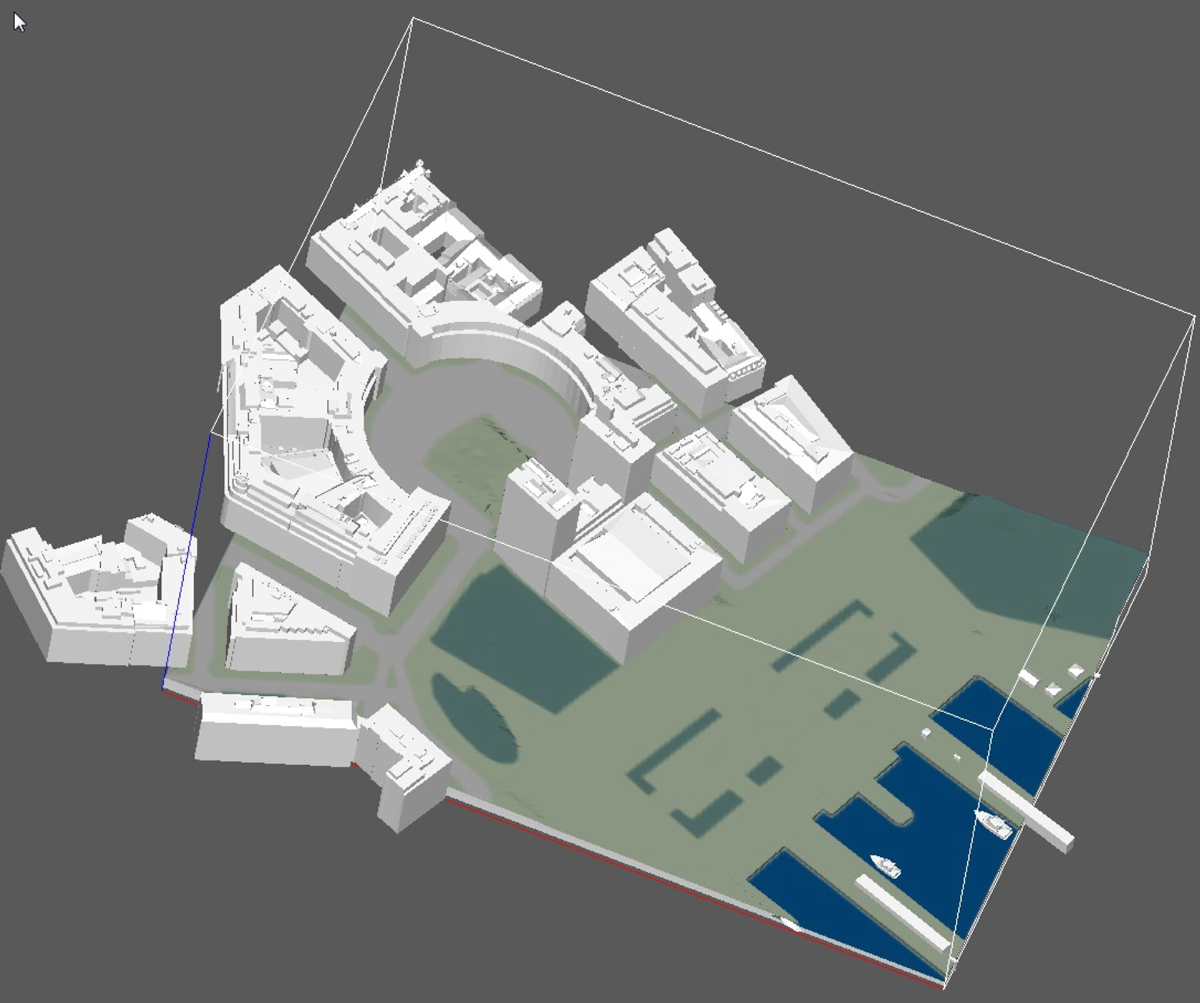
Attaching the buildings to the terrain is careful work. Click to enlarge.
Making the Blocks
The upfront digital preparation was by far the most time-consuming part of the project. But in March 2014, it was time to start printing.
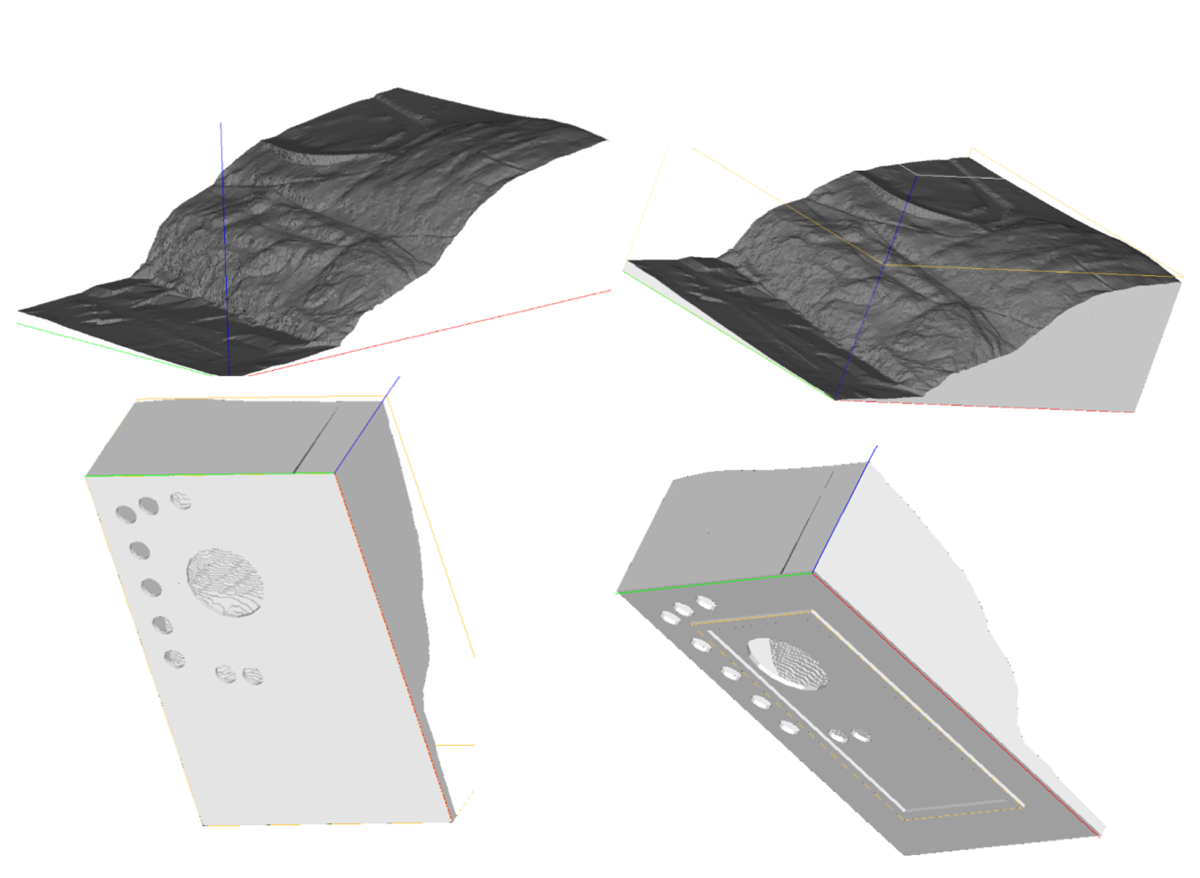 3D printing is expensive – and slow. And so the block design needed to optimize materials. The variable elevation frame cut down the height of the blocks as much as possible, and the terrain shells you see here show how by hollowing them out they were able to recoup filler material for maximum efficiency.
With the 3DS terrain and buildings merged in the print program, they turned on the printers – and kept them busy until September.
Going forward, whenever a structure is added or changed, they simply pull out the block and print a new one – updating in a matter of days.
Stein Moen, Division Manager, can’t say enough good things about his team. “We had no experience with FME at the start,” he says, “and the team was amazing, testing and learning on the job, figuring it out as they went. FME has been at the heart of the project – who knows how long it would have taken without it.”
What’s next? The team wants to create a smaller, portable version of the model that can be moved around for events like public consultations, in combination with a very cool projection system that overlays thematic maps on models. And their work with FME now extends to many digital data products, 3D included.
Kay, Stein, and the rest of the team are justifiably proud of this huge undertaking – and you can take a tour of it with them here:
We’d like to also give a shout out to Safe Value-Added Reseller and Solution Provider Norkart AS, whose SOSI and FME expertise helped make this all happen. “Oslo municipality have shown that with FME it is possible to extract data managed in different systems, formats and standards and use them to create real life 3D-models!” says Sigbjørn Tillerli Herstad, FME Certified Professional/Trainer, at Norkart.
We’re incredibly impressed too!
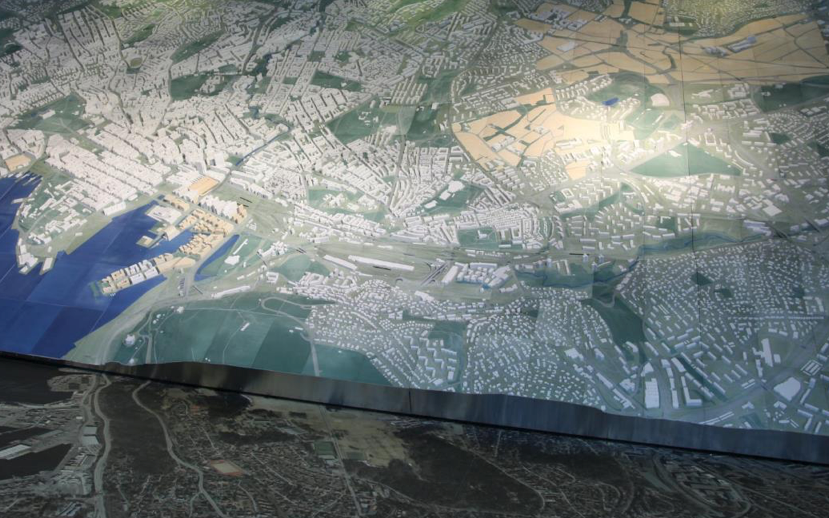
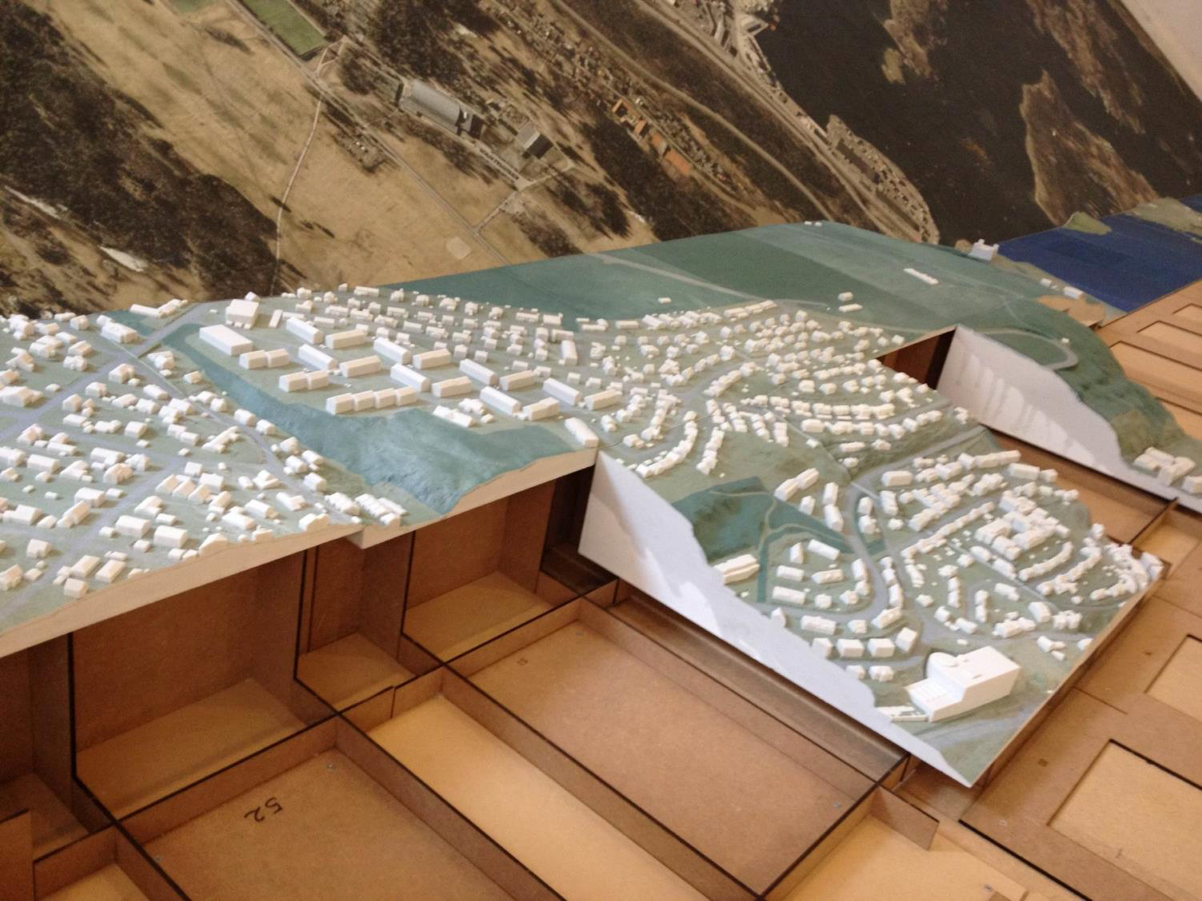
The model rests on an orthophoto of the surrounding area. Click to enlarge.

Kris Majury
Kris is a content developer at Safe Software who concentrates on creating documentation for FME transformers. Kris works remotely from the wonderful Gulf Islands off the coast of British Columbia.